Curvy Celebrations: It’s Almost Here!

Hello Friends!

Are you ready for some fresh stampin’ inspiration?  Get ready for Curvy Celebrations!  It’s almost here…just a few more days!

In anticipation of the new January – June, 2021 Mini Catalog’s release on January 5, 2021, Stampin’ Up is offering an early release bundle from this catalog!  It’s just in time for the holidays and the WHOLE variety bundle is only available during the pre-order period which begins on November 3 and runs through January 4!

The Quite Curvy Variety Bundle is shown below.

After January 4, you will no longer be able to get the Curvy Christmas stamp set, or the Classic Christmas DSP – these two items are EXCLUSIVE to the preorder period.

The Quite Curvy stamp set, which is very versatile for many occasions, and coordinating Curvy Dies, will continue and be in the new catalog.

Remember, if you order products in a bundle, you’ll save 10% off the purchase price!


The Curvy Christmas stamp set is fabulous for it’s country rustic images, but add in the Curvy Dies, and suddenly you’ve taken your project from cute, to WHOA-worthy!

Here’s an up-close look at the Classic Christmas 6″ x 6″ DSP.  I’ll be using it in tomorrow’s blog post!

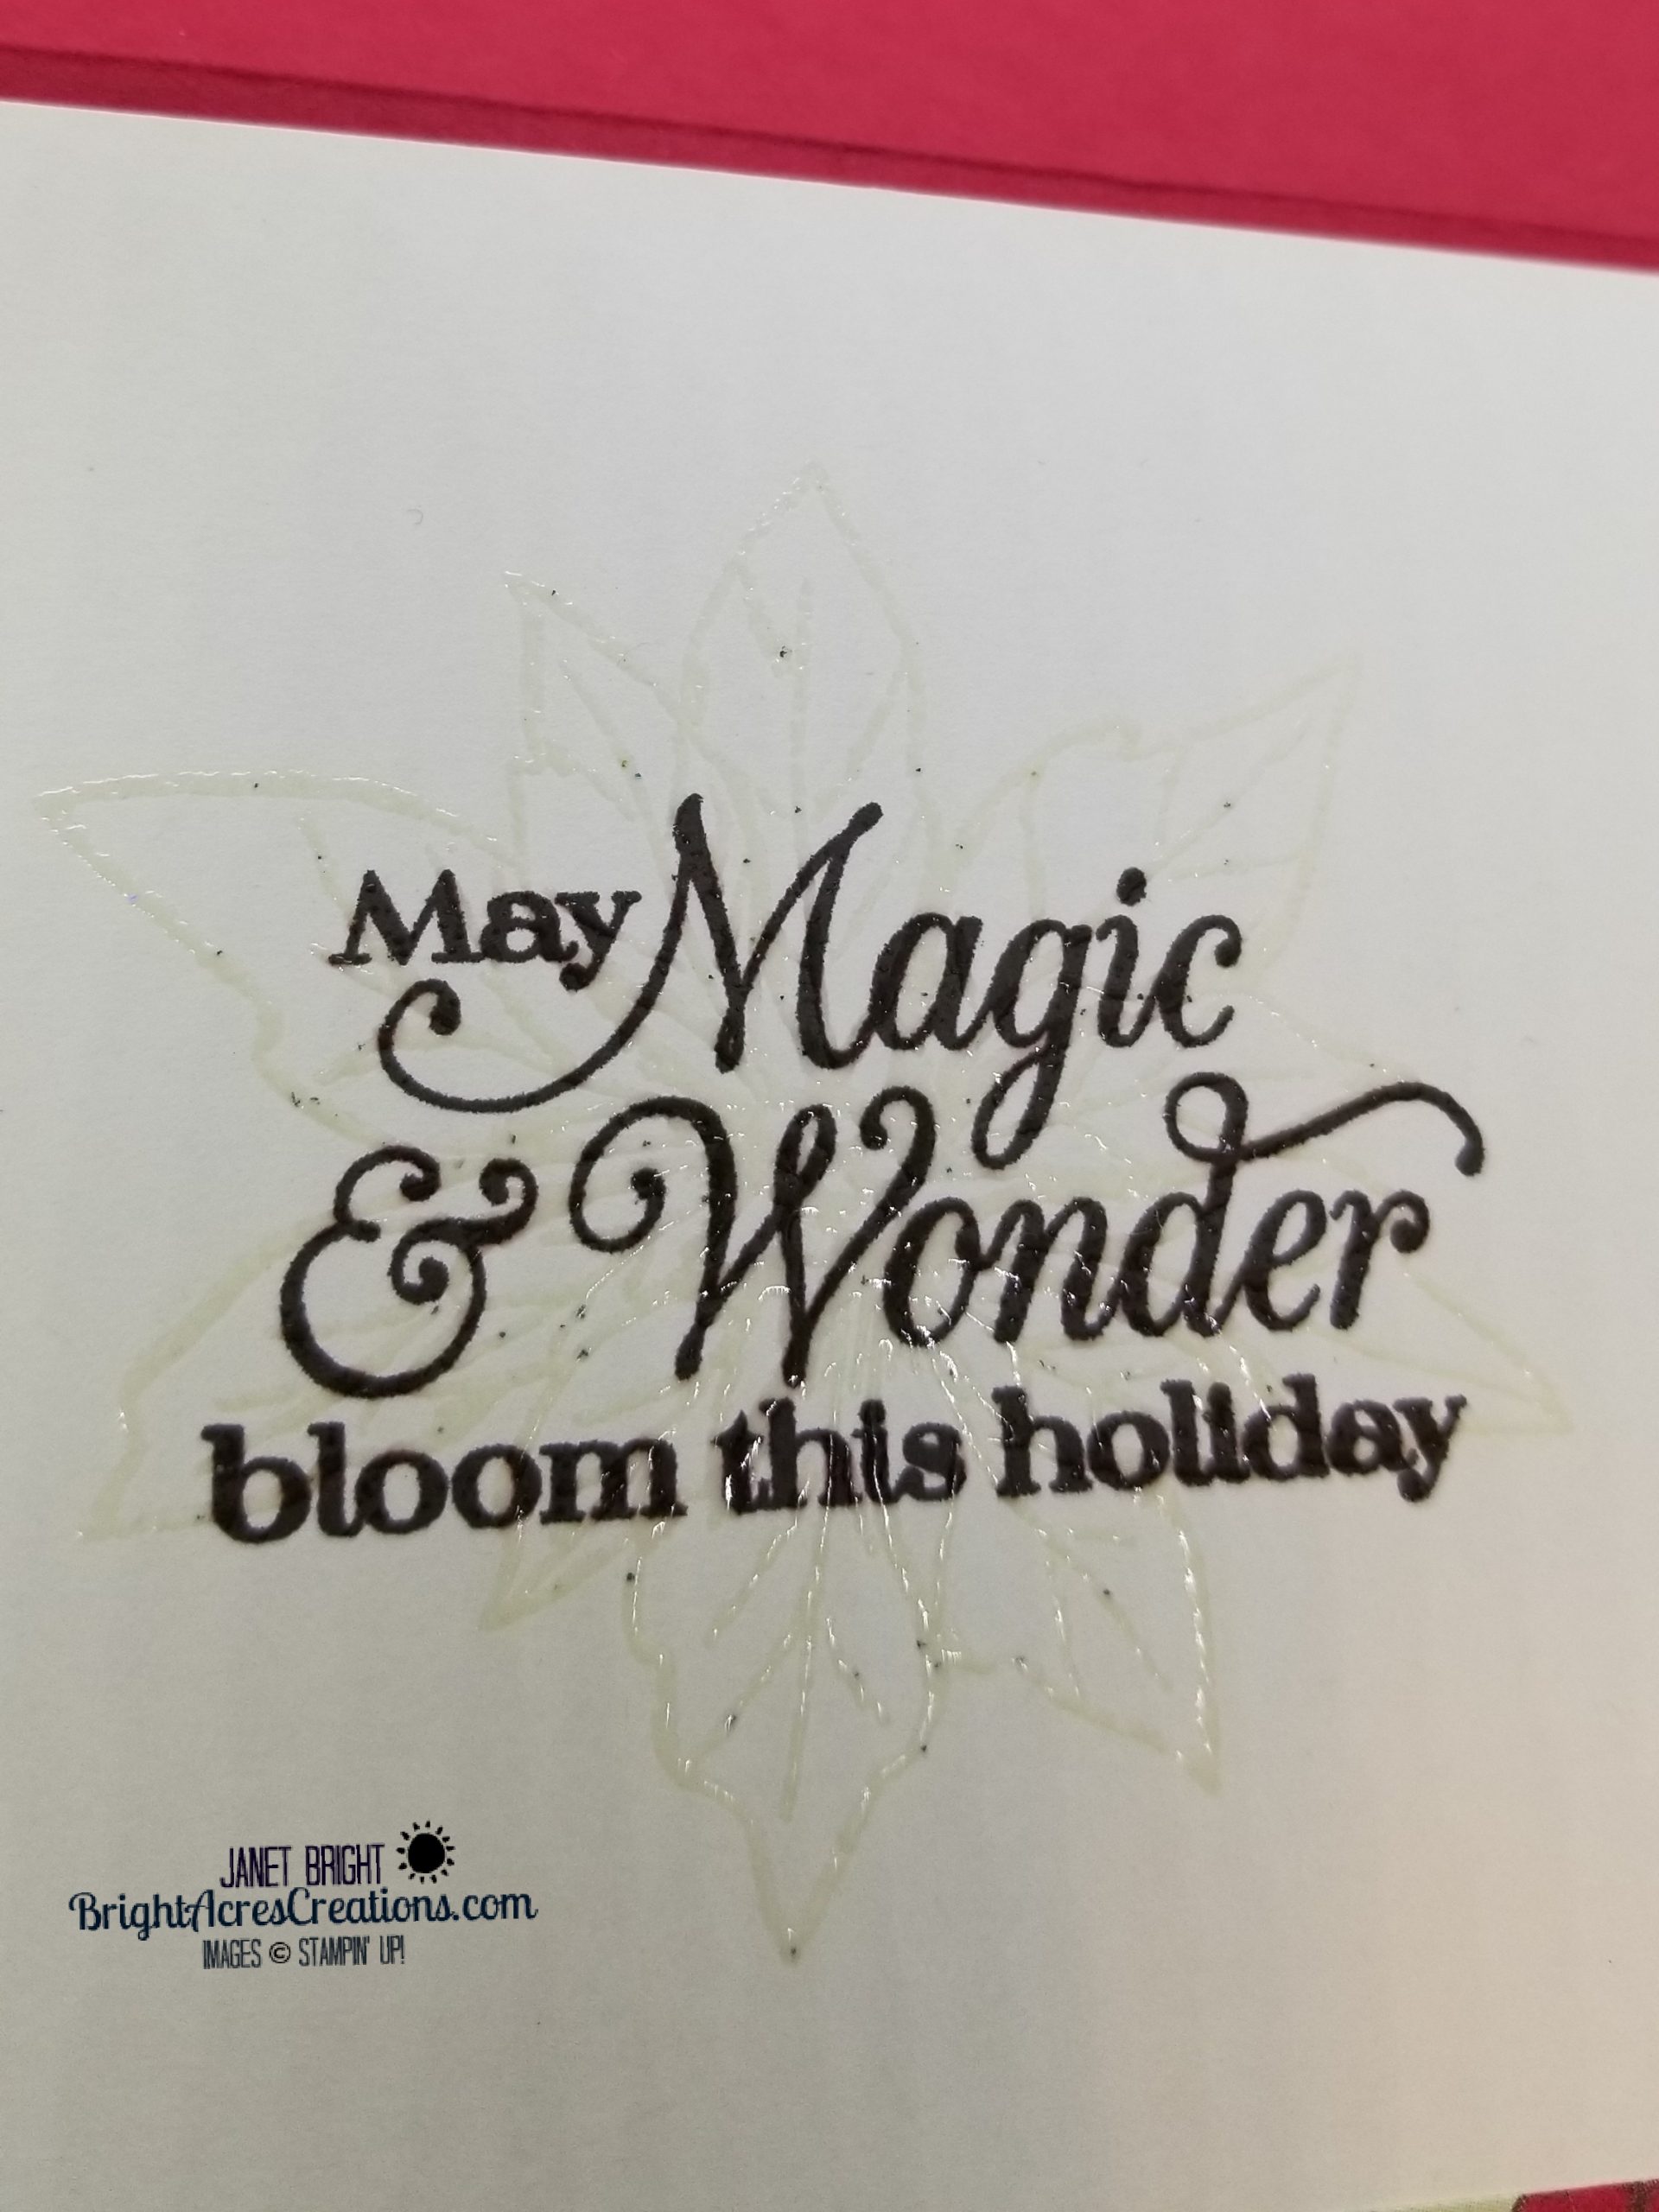
Just look at that curved border edge on my project today, and the curved sentiment that runs so perfectly along it!  May I say, WHOA?  I’m loving this set so far and can’t wait to share more of it with you!  These dies make it sooo easy to dress up a card to FABULOUS, especially when paired with that gorgeous Brushed Metallic Cardstock!

My color choices were inspired by Color Throwdown Challenge 617 (#ctd617):

color swatch #ctd617  

To get that chartreuse green, I had to pull out some retired SU cardstock, Lemon-Lime Twist.  I also chose to use my Wink Of Stella glitter pen to jazz up my Lemon-Lime Twist sprigs!

So with no further ado:

LET’S GET INKY!

Continue reading “Curvy Celebrations: It’s Almost Here!”

Poinsettia Place - not just red anymore

Poinsettia Petals – They Don’t Have To Be Red

Hello Friends!

It’s raining outside which means – the smoke is clearing!  I’ve been praying hard for rain, as I know so many others have as well.  I’ve not heard official reports as yet, but I’m guessing the showers we’ve been getting since last night have really knocked the heat out of the fires we’ve been experiencing.  A very welcome change for all of our amazing firefighters!  Hopefully the thousands of displaced families will be able to go back home soon.

I met some lovely pups at the animal shelter this week, many of whom are there due to their owners having to evacuate and unable to have their pets with them.  The pups were all so eager to get out of their cages and soak up some affection, which I was happy to provide.  Hopefully they and their families will be reunited soon.  I can only imagine what’s going through the minds of those fur babies.  It was obvious that some of them are quite accustomed to being lap dogs and are missing their people badly, as I’m sure their people are missing them too.  I’m looking forward to returning to the shelter next week and hopefully finding that some, if not all, of the evacuees have gone home.  I enjoyed my time at the shelter and have committed to volunteering there at least one day a week.

At any rate, the rain has me back in my craft room and I chose to play with the Poinsettia Petals products once again.

I’m a country gal and my jeans are nearly always dirty by the end of the day.  I frequently have to scrub the dirt from under my fingernails as well.  I find myself frequently trying to “grunge up” my cards just a little bit for a more rustic look; today was no different.

I cut my mat layers and when I laid them out, everything just looked too “clean”.  I generally turn to my ink pads and sponges to ink up the edges, but this time I decided I wanted a little imperfect “gilded” edge to my DSP.  I tried my gold gilding marker, but it wouldn’t apply evenly and didn’t look as I had imagined.

So, I found some metallic paint (I think I got it on Amazon some time ago), and a flat brush and sort of smeared that around the edges of my DSP.  I intentionally applied it thin so I could see the DSP underneath, and rounded the inside corners a bit.

The paint has just enough metallic shimmer to it to highlight the gold foil paper without being “matchy-matchy”.  I think it adds that little bit of rustic-ness that I was looking for!

I chose to use So Saffron Stampin’ Blends (dark and light) to color the poinsettia petals which were stamped in Early Espresso.

Has anyone else noticed that poinsettias come in just about every color of the rainbow the last few years?  As such, one could make the poinsettia any color, as they’re certainly not limited to red, pink and white any longer!

LET’S GET INKY!

Materials:

Stamp Sets Used:

  • Poinsettia Petals
  • For Unto Us

Metal Dies:

  • Poinsettia Dies
  • Beautiful Boughs

Punch:

  • Label Me Lovely

Embossing Folder:

  • Scripty 3D

Paper:

  • Whisper White CS (card base) – 5 1/2″ x 8 1/2″ – fold in half at 4 1/4″
  • Poinsettia Place DSP – Mat 1 (Brown pinecones) 5 3/8″ x 4 1/8″    Mat 2 (poinsettias) 5 3/8″ x 3 3/4″
  • Gold Foil Paper – 3″ x 2 1/2″
  • Garden Green CS

Ink:

  • Early Espresso

Accessories:

  • Gold Glitter Enamel Dots
  • Gold Cord
  • DecoArt Metallic Venetian Gold Paint (available on Amazon)

PUTTING IT TOGETHER:

  1. Apply metallic paint to edges of DSP and let dry.
  2. Run gold foil paper piece through Stampin’ Cut & Emboss machine in Scripty 3D embossing folder.
  3. Stamp one each of all three poinsettia petals stamps in Early Espresso.
  4. Use So Saffron Stampin’ Blends Combo to color petals.
  5. Crop petals out using Poinsettia Dies and adhere together using liquid glue or mini glue dots in the center of each.
  6. Apply Gold Glitter Enamel Dots to center of poinsettia.  Using the Take-Your-Pick tool to apply these small dots is the easiest method (personal opinion!)
  7. Crop fir boughs from Garden Green CS using Beautiful Boughs Dies.
  8. Stamp the sentiment from For Unto Us on Whisper White scrap and use Label Me Lovely Punch to cut out.
  9. Adhere paint-edged mat 2, to brown pinecone mat 1.
  10. Adhere sentiment label to gold foil embossed piece, and adhere that to mat stack about 1/2″ from top and centered.
  11. Adhere the end of a 6″ piece of gold cord to back of mat stack approximately 1/4″ from left edge, wrap over the front and adhere other end to back as well.
  12. Tie a small bow with a piece of gold cord and use a mini glue dot to stick it to the cord on the front of the card approximately at the bottom edge of the gold foil piece.
  13. Adhere fir boughs and place poinsettia in the center.

DONE!

A country-rustic, not-red poinsettia for Christmas!

I hope I’ve inspired you to get a little inky today.

It’s time for me to go feed my horses and get a little country-grungy cleaning their stalls!

Until next time,

Janet

Product List

Stampin Up Poinsettia Petals With Free PDF instructions

Lots Of Layers With Poinsettia Petals

Hello Friends!

I’ve been busy in my craft room playing with all of my new “toys” from the holiday mini catalog.  Today I wanted to share one of the cards I put together using the Poinsettia Place suite of products.

I love lots of layers and textures on the cards I create and this set of products delivers all of that and more!  Take a close look at the Beaded Pearls in the center of the poinsettia; they are soooo PRETTY!

Stampin Up Poinsettia Petals With Free PDF instructions

I also used Versamark ink and clear embossing powder to create a watermark effect over the inside sentiment.  It looks so pretty, though doesn’t show well in the pictures.  Give it a try and see what you think!  Just make sure your sentiment ink has dried well before over-stamping with the Versamark!

Also, as you can tell in the picture, my clear embossing powder is quite old and over the years has apparently gotten some little bits of glitter or other colored embossing powder mixed in.  This actually prompted another trip to my Stampin’ Up store (darn it!) to buy some fresh embossing powder (and a few other things), as well as a good cleaning of my embossing tray that I use!  Dean says the specks just give it a more custom, one-of-a-kind look!  He’s right about that!  It will be one-of-a-kind, as I’m going to wait for my fresh EP to arrive before making duplicates of this card!


I’m feeling pretty good right now that I’ve gotten a little jumpstart on Christmas cards and I even started my Christmas shopping the other day!  Who knows…Maybe for the first time EVER, I actually will get all of my Christmas shopping done by the end of August!  Getting it wrapped may be a different story, however!

So, what about you?  Have you had a chance to play with any of the new holiday products yet?  If you haven’t placed your order yet, I would encourage you to do so in order to get a head start on the holidays yourself!

It feels pretty good to be ahead of the game!  I can see myself now… baking, decorating, crafting, leisurely wrapping gifts with Christmas music playing in the background and actually enjoying the holidays rather than hustling to get everything done at the last minute (which is what I’ve done the past few years and is not enjoyable!)

At any rate, I hope you craft today – for the holidays or otherwise.  Take some time to slow down and enjoy the process, always remembering the reason for the season!

LET’S GET INKY!

I’ve created a PDF file with all the specific measurements and instructions for making this card which you can download and print if you’d like!  Just click below and you’re on your way to an early start on holiday prep!


Poinsettia Petals Color Block Card


If you have questions, please use the “contact” tab at the top of this page and reach out to me.  I’m always happy to help you in your crafting endeavors!

And, please let me know in the comments below if you like the downloadable PDF, or prefer all the directions written out on each post!

Until next time, here’s to hoping you get a little INKY!

Janet

Product List