Sending Cards With An Attitude Of Gratitude

Hello Friends,

Oh my sunshine!  We’ve had absolutely gorgeous weather the last few days and I’m so excited to be getting my yard in order.  I’ve been weeding and planting flowers.  Dean has been trimming trees and moving dirt around with the tractor, re-sculpting the lower portion of our yard.

It feels so good to be outside in the fresh air and sunshine!  It certainly makes me thankful for all that our Good Lord has done for us!  I try to maintain an “attitude of gratitude” at all times, but I must admit, I fail miserably sometimes.  It’s so easy to get caught up in the negative things going on in our world, but being thankful for all the little things around us, as well as the big things, can change one’s focus tremendously.   I want to encourage you all to remember to say thank you… thank you for all that you have.

When was the last time you got a thank you card in the mail for just doing something you always do?   It’s so easy to issue a quick verbal “thank you” to others; and, yes, that’s appropriate.  Yes, we need to say thank you, but wouldn’t it be nice to follow that up with a pretty card?  In our age of technology, writing letters and sending cards is done much less often.  But getting a handwritten letter or card in the mail is just that extra reminder to let others know we’re thinking of them and thankful for who they are and the things they do…. big or small.

I’ll admit that as a “paper enthusiast” (okay…paper hoarder), I have many cards made and filed away in a drawer to use “for the right occasion”.  I aim to change that!  If you’re like me and have a stash of cards sitting in a drawer, I’d like to challenge you to GET THEM IN THE MAIL!  Like NOW!!!  Let that friend who’s always there for you know how much they’re appreciated; your hairdresser (anyone else due for a haircut when the shops open up?); your mailman; your garbage man; UPS man; doctor; daycare provider; pastor; neighbors; and perhaps most importantly… those you live with.

Let’s spread some sunshine with some good old-fashioned paper and ink!!!

A thank you card seems to be in order with all that said…

LET’S GET INKY!!

Continue reading “Sending Cards With An Attitude Of Gratitude”

A Parade Of Crazy Melodies – Color Challenge

Hello Friends,

Today’s card was inspired by Color Challenge #789 over at Splitcoast Stampers.  The three colors were:  Poppy Parade, Cajun Craze, and Mango Melody; with dessert option to add a frame.

I don’t think these three colors would’ve been my first choice in a color combo, but given a challenge, I do my best to rise to the occasion!

I look at these colors and my first thought is Fall.  But, I’ve been in such a Spring mode lately, I couldn’t bear to jump all the way to Fall.  So, I landed on more of a Summer note!

I actually went and bought flowers for my yard yesterday…YAY!  I love springtime and planting flowers.   The deer like it too…. they’re like “The salad bar IS OPEN!”  I try to be very careful to buy “deer resistant” flowers, but they still like to sample everything in the yard.  We’ll see which, if any, the deer will leave alone.  Our deer don’t seem to be picky eaters!

I love geraniums and petunias, they just spell S-U-M-M-E-R to me.  Unfortunately, they spell Y-U-M to the deer!

I used to try planting them in whiskey barrels on the outer edges of our deck – surely the deer wouldn’t be bold enough to eat out of the barrels right by the house right?  WRONG!

Last year I had to try again, I planted just a single geranium in a small pot placed in the middle of our patio table on our front deck.  SURELY the deer wouldn’t come right up on the deck and eat off the table!  WRONG AGAIN!  A little doe just stepped right up there and nibbled away in the middle of the day.  When I went outside to shoo her off, she seriously hesitated before bailing off the deck.  And then she just went to the edge of the yard and watched me, only running off when I stepped off the deck and walked toward her yelling and waving my arms!  The next morning, yep, the geranium was eaten down to the potting soil!

But, back to the color challenge!

Here’s what I came up with:

Let’s Get INKY!

Continue reading “A Parade Of Crazy Melodies – Color Challenge”

Let’s Do More With Paper Pumpkin!

Hello Friends!

Again, just taking a quick break in my craft room today with Paper Pumpkin.  With these handy monthly kits, a quick break is all it takes to make gorgeous cards ready for giving.

Yesterday I spent several hours outside weeding flowerbeds and decided to try a more spring-themed take on the April PP “My Wonderful Family”.

I love hydrangeas, but unfortunately, so do the deer and therefore I don’t have any in my yard.  The “tree” stamp in this kit, however, lends itself to a hydrangea quite well by butting them up side-by-side.

  • I used Rococo Rose for the stamping, and then sponged Blushing Bride over that and fussy cut the image out.
  • I added a 4 1/4″ x 3 1/4″ piece of Mint Macaron CS, running it through my Big Shot in the Tufted 3D embossing folder.   * This embossing folder is retiring, so get it while you can!!!  
  • The sentiment was stamped in Soft Suede on the precut label from the PP kit.
  • Everything else – the card base, die-cut and embossed leaves, butterfly, pearls, and tag (as mentioned) were from the Paper Pumpkin kit!
  • So Easy and SOOOO Handy when you want to craft but don’t have a lot of time!!!


The next card I again opted for a springtime theme and wanted to mimic the gorgeous ornamental plum trees and ornamental cherry trees that are blooming all over the place right now.

  • I chose to use Flirty Flamingo to stamp the tree, and Mango Melody to stamp the butterflies.
  • I then turned to my March Paper Pumpkin, “No Matter The Weather”, for the grass stamp which was stamped in Pear Pizzazz.
  • The rabbit is also from the March PP and stamped in Soft Suede, then colored with the dark and light Crumb Cake Blends.  I then fussy-cut him out and popped him up with dimensionals (included in PP).
  • Again, the rest of the card elements are from the April Paper Pumpkin, all pre-cut and ready for use!

What can be easier???

Continue reading “Let’s Do More With Paper Pumpkin!”

Paper Pumpkin…What Are You Waiting For?

Hello Friends!

I wanted to share with you again just how much I love Paper Pumpkin.  I got my April Paper Pumpkin a few days ago and while I’ve been super busy with other necessary household projects lately, I did get a short bit of crafting time in.  That’s one of the things I love about Paper Pumpkin!  It only takes a short bit of crafting time and you have stunning cards ready for giving.

April’s Kit was named “My Wonderful Family” and I’m sharing a picture of the contents here, along with the picture of the made cards and the included stamp set.

In about 15 minutes the other evening, I’d made 2 cards (one each of the super cute cards as intended with the instructions).  I then decided to make an alternate card, using just the included stamp set, and some of my own supplies.  The results are below.

These are the cards made as “intended” in the kit.

And this is the alternate I made with just the stamp set and a few supplies from my personal stash.

I love taking what I’m given each month in Paper Pumpkin and seeing what else I can do with the contents.  The stamp sets are generally quite versatile.  If I need a quick sentiment stamp, I often turn to my Paper Pumpkin sets.

I’ve found that the sets fit very well in a 4″ x 6″ photo sleeve, like those in an “old-fashioned” photo album that you just slid your pictures into the sleeve.  I keep those all neatly in a binder and have the stamp sets readily available after I’ve utilized my Paper Pumpkin kits.

I also love that I generally end up with more glue dots and dimensionals, as well as some of the embellishments, than I need to complete the kits, so I always have those on hand as well.  The included ink spot each month ends up being very handy also.

I like to take my Paper Pumpkins camping with me.  We generally “dry camp” out in the wilderness somewhere and in the evening-time, I’ll break out my Paper Pumpkin and make cards by lantern-light.  Or, I’ll pre-make some card kits to take with me and take my collection of ink spots rather than full-size ink pads.  They’re perfect for on-the-go occasions.

I love surprises, the anticipation of “What’s going to be in my box?” I eagerly await my Paper Pumpkin each month!

Stampin’ Up! released a teaser earlier this month regarding May’s Paper Pumpkin, which I shared a few days ago.  The May kit is called “A Kit In Color” and will feature the brand new 2020-2022 In-Colors.  They’ve now shared with us what those colors are and they’re really pretty.  The picture depicts three of those colors:  Bumblebee, Just Jade, and Magenta Madness.  The other two new In-Colors are Misty Moonlight and Cinnamon Cider; but they’re making us wait for our Paper Pumpkins to share those!

If you’re like me and love surprises (that you know you’re going to like), and cards that you can put together quickly and know they’re going to be beautiful, then Paper Pumpkin is for you!  So, what are you waiting for?!

You can subscribe here!

And remember, there are multiple subscription options:  Month-to-month for $22/mo (shipping included) – cancel anytime; 3 month prepaid; 6 month prepaid; and 12 month prepaid.

I’ll be working on more alternate ideas for April’s Paper Pumpkin and share those soon!

Until next time,

Janet

It’s Time To Say Goodbye (to some SU Products)

Hey Friends,

The Retiring Lists of Stampin’ Up! Products from the 2019-2020 Annual Catalog and the 2020 Spring Mini Catalog are out!  The links to the PDF files for the retiring items are below.  As I’ve mentioned in earlier posts, many of the items on the retiring lists go FAST!  So check out the lists and order the items you want quickly, as when they’re gone, they’re GONE FOR GOOD!

The print on these lists is tiny, so use the “+” sign at the top of the page to zoom in and make them easier to read!

Retiring List from 2019 – 2020 Annual Catalog

Retiring List from Spring, 2020 Mini Catalog

Many items are at reduced prices, so check it out!  Jot down the item numbers and then click on the picture below to order.

I hope you do it soon so you don’t miss out!!  If you need assistance with ordering, please reach out. I’m always happy to help!

Janet


Urgent Reminder!

Hey Friends!

Just a quick reminder that the Stampin’ Up!’s retiring list will be out in a very short while and the 2018-2020 In-Colors will be on that list.   As soon as that list is published, the In-Colors are always the first to sell out FAST!!!  So, if you want to stock up on these beautiful colors, I would suggest you do it NOW before that list is out, because when they’re gone, they’re GONE FOREVER!

I’m so sad to see them go, I love these bright colors!  I’m providing the links to all of the ink, paper, and embellishments in these colors below, so if you want them, GET THEM NOW!!

I’m looking forward to the big reveal of the NEW 2020-2022 In-Colors, however!  I hope they’re bright and bold!!!  In that regard, just another note…

The May Paper Pumpkin will be all about the new In-Colors which will be revealed in just a few days on April 24!   We’ve been told that this kit will feature the 2020-2022 In-Colors and Purple Posy (from 2019-2021 In-Colors).  I can hardly wait to see the new colors!  How about you?

About the May Kit:

A Kit In Color

  • Kit contains supplies for 12 cards and envelopes
  • 8 cards are traditional size
    • Card size: 4-1/4″ x 5-1/2″ (10.8 x 14 cm)
    • Envelope size: 4-1/2″ x 5-3/4″ (11.4 x 14.6 cm)
  • 4 cards are note card size
    • Notecard size: 5″ x 3-1/2″ (12.7 x 8.9 cm)
    • Envelope size: 5-1/8″ x 3-5/8″ (13 x 9.2 cm)

Coordinating Colors: Four NEW In Colors plus Purple Posy from the 2019–2021 In Color collection. (The new In Colors will be introduced on April 24.)

*Remember, when you subscribe to Paper Pumpkin, Stampin’ Up!’s crafting subscription program, each month you’ll get a professionally designed kit filled with fun projects for every sharing occasion.  Each kit comes with all the stamps, ink and paper (already cut) you need for making the projects!

There are multiple options for subscribing: Month-to-month (pay-as-you-go) and cancel anytime; 3-month prepaid; 6 month pre-paid; and 12-month prepaid.  So, check it out!

Click the picture below to subscribe!

Thank you! Now go get INKY!!

Janet

Product List


Oldie But Goodie

Hello Friends,

Today I chose to pull out a stamp/die set that’s been around for a while, but is one of those that just never goes out of style – “Flourishing Phrases” and “Flourish Thinlets”.  I also chose to use a technique that I haven’t done in a while… Black Magic!  This effect is created by stamping a white image on black paper and then coloring with colored pencils.  I love the effect it gives, and then finishing it off with white highlighting.  So pretty!

So let’s get INKY!

Continue reading “Oldie But Goodie”

Are You A Messy Painter?

Hello Friends,
I chose a super quick and easy project today, as we continue to be quite busy with maintenance work at our rental house. Our new tenant will be moving in soon and we’ve been checking things off our to-do list as fast as we can! I know my title has nothing to do with today’s card, but I was just pondering whether most people are more like me when they paint? Or, more like my husband.  While I pride myself on neat painting – not getting paint on baseboards, flooring, doorknobs, light fixtures, etc., somehow, I always end up with paint on my hands and certainly on my clothes!  I have specific “paint clothes” that I wear when I have to paint because they’re already covered with paint.  You can pretty much look at the history of our house colors by the colors on my jeans!  

On the other end of the spectrum is my husband, Dean.  Not only is he a neat painter with never a drip or smudge of paint anywhere he doesn’t want it, but he can paint and not get a speck of paint on his hands or clothes!  I’m in awe of people like that…How in the heck do you do that???  

So please, just for my own little data collection, comment below and let me know if you’re more like me, or more like Dean!!!

But back to our quick and easy (but so darn cute) card of the day!

I chose to use Stampin’ Up’s “We’ll Walrus Be Friends” stamp set.  Isn’t that walrus just too cute?  Oh, and our weather has been SO BEAUTIFUL the last few days with bright blue skies and sunshine, temperatures in the mid-70s… seeing that little walrus floating in the water makes me want to dive in.  I do suppose, however, where he’s from the water is probably very cold!  I prefer the beautiful, warm Caribbean seas!!!  Just the same, I’m ready to go diving!

LET’S GET INKY!

Colors and Measurements:

Card Front:

  • Whisper White CS 5 1/2″ x 8 1/2″; score at 4 1/4″ and fold in half for 5 1/2″ x 4 1/4″ card
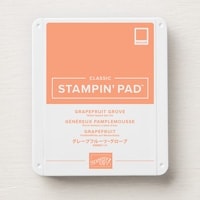
  • Daffodil Delight CS Mat 1:  5 1/4″ x 4″
  • Night of Navy CS Mat 2:  5″ x 3 3/4″ – run through Big Shot in High Seas 3D embossing folder
  • Neutrals 6 x 6 DSP in Night of Navy (dots): 3 1/4″ x 1 1/2″
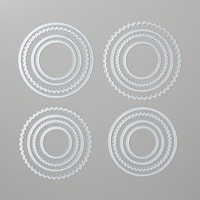
  •  Daffodil Delight CS 3″ x 3″ – use Layering Circles Dies for scalloped circle
  • Whisper White CS 2 1/2″ x 2 1/2″ – use Layering Circles Dies for image circle
  • Whisper White CS 1/2″ x 2 1/4″ for sentiment

Directions:

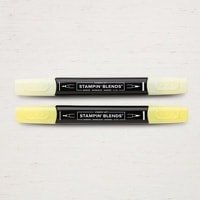
  • Stamp the walrus image from “We’ll Walrus Be Friends” on the white circle and color with Stampin’ Blends.  I used Night of Navy (dark and light); Smoky Slate (dark and light); Daffodil Delight (dark and light).
  • Adhere the image panel to the Daffodil Delight scalloped circle.
  • Stamp the fish on a scrap of Whisper White CS, color (Daffodil Delight Stampin’ Blends), and fussy-cut them out.
  •  Stamp sentiment on 1/2″ x 2 1/4″ Whisper White CS.
  • Put it together – 
  • Layer the Daffodil Delight Mat 1 on top of the white card base.  Top that with the embossed Night of Navy Mat 2.
  • Adhere the Night of Navy DSP (dots) centered horizontally and about 1/2″ from the bottom of the Night of Navy Mat 2.
  • Center the sentiment tag vertically on the DSP, but position it all the way to the left edge of the DSP.
  • Attach the walrus image panel using Stampin’ Dimensionals to make it really stand out.
  • Adhere the fish on either end of the sentiment tag.
  • Tie a small bow in some Whisper White Twine and attach to left-bottom side of image panel.  

Card Inside:

  • Daffodil Delight Mat 1:  5 1/4″ x 4″
  • Whisper White Sentiment Panel:  5″ x 3 3/4″

Directions:

  • Stamp the “Just floating by to say hi” from “We’ll Walrus Be Friends”
  • Under that, stamp the “Party On” sentiment from “Balloon Adventures”
  • Stamp the fish and color it up!

Such a cute card for a child’s birthday, or a “kid at heart” birthday!  

Thanks for stopping by and spending some time with me today.  

I hope you make some time to get a little inky!

Until next time,

Janet

P.S.  Don’t forget to satisfy my curiosity regarding your painting habits… messy or neat???  I want to know!!!  Please comment below!!!  


Product List

Balloon Adventures Photopolymer Stamp Set
[142823]
$26.00
Paper Snips
$10.00

Let’s Always Remember & PEACEFUL POPPIES IS BACK!

This card was made for a card challenge over at Fusion using the sketch and picture as below.


The “theme” of this challenge by Fusion was inspired by ANZAC Day, which to Australians and New Zealanders is similar to our Memorial Day in the United States;  a day set aside to remember and honor military personnel who died in service.   It seems fitting at this time, as we are feeling the loss of many of our freedoms due to COVID-19, that we too always remember… freedom is not free.  If it weren’t for our military personnel, past and present, the country we live in would be a whole lot different.  So, even though our Memorial Day isn’t for another month-plus, let us ALWAYS REMEMBER that this great country and the freedoms that we take for granted every day come at a heavy price, and should we become too complacent, could be taken from us once again.

I used Stampin’ Up’s Painted Poppies stamp set with the sentiment coming from Peaceful Moments, along with the dies also associated with these stamp sets, Poppy Moments and Painted Labels.  This suite of products has to be my all time favorite set, and apparently many other stampers as well, as they have been backordered so far that Stampin’ Up made these products unorderable for the longest time.

HOWEVER… I JUST LOOKED AND THE PEACEFUL POPPIES SUITE BUNDLE IS BACK!!!!!

It appears that it will begin shipping again on April 20!!!!!!  SOOOO… if you’re interested in this suite, NOW IS THE TIME TO ORDER, as it may run out again fast!!!!

Continue reading “Let’s Always Remember & PEACEFUL POPPIES IS BACK!”

Mirror Image – Double your stamp use!

Hello Friends,

Today I pulled out one of my favorite stamp sets again, “Let It Ride”.  I had been over at our rental house earlier today doing some maintenance in preparation for new tenants, and it took me back to the “early days” in my husband’s and my relationship.  My youngest daughter and I rented that house some 10 years ago after we had gotten a couple horses (we’d never had horses before).  Dean, then my landlord, and now my husband (yep, married my landlord), “rescued” me from my particularly ornery gelding more than once.  He always had the patience of a saint as I learned a little bit about horsemanship the hard way, and was always so kind to intervene when needed.   When thinking about today’s project, after a day of reminiscing, “Let It Ride” was the natural choice.

Using the “mirror image” technique allowed me to use one stamp but mirror the image to make it look like the horses are looking at each other (oh so lovingly if I do say so myself!)

Continue reading “Mirror Image – Double your stamp use!”